
13 posts tagged with "progress-update"

View All Tags

· One min read

Final Daily:

Ethics in Product Design:

We had our final lesson today, focusing on the topic of ethics in product design. The session emphasized that a good design is not just about aesthetics or functionality but also about ensuring ethical considerations in the design process. This lesson served as a vital reminder that as designers, we hold a responsibility to consider the wider societal impacts of our work.

Thoughts on the OIP:

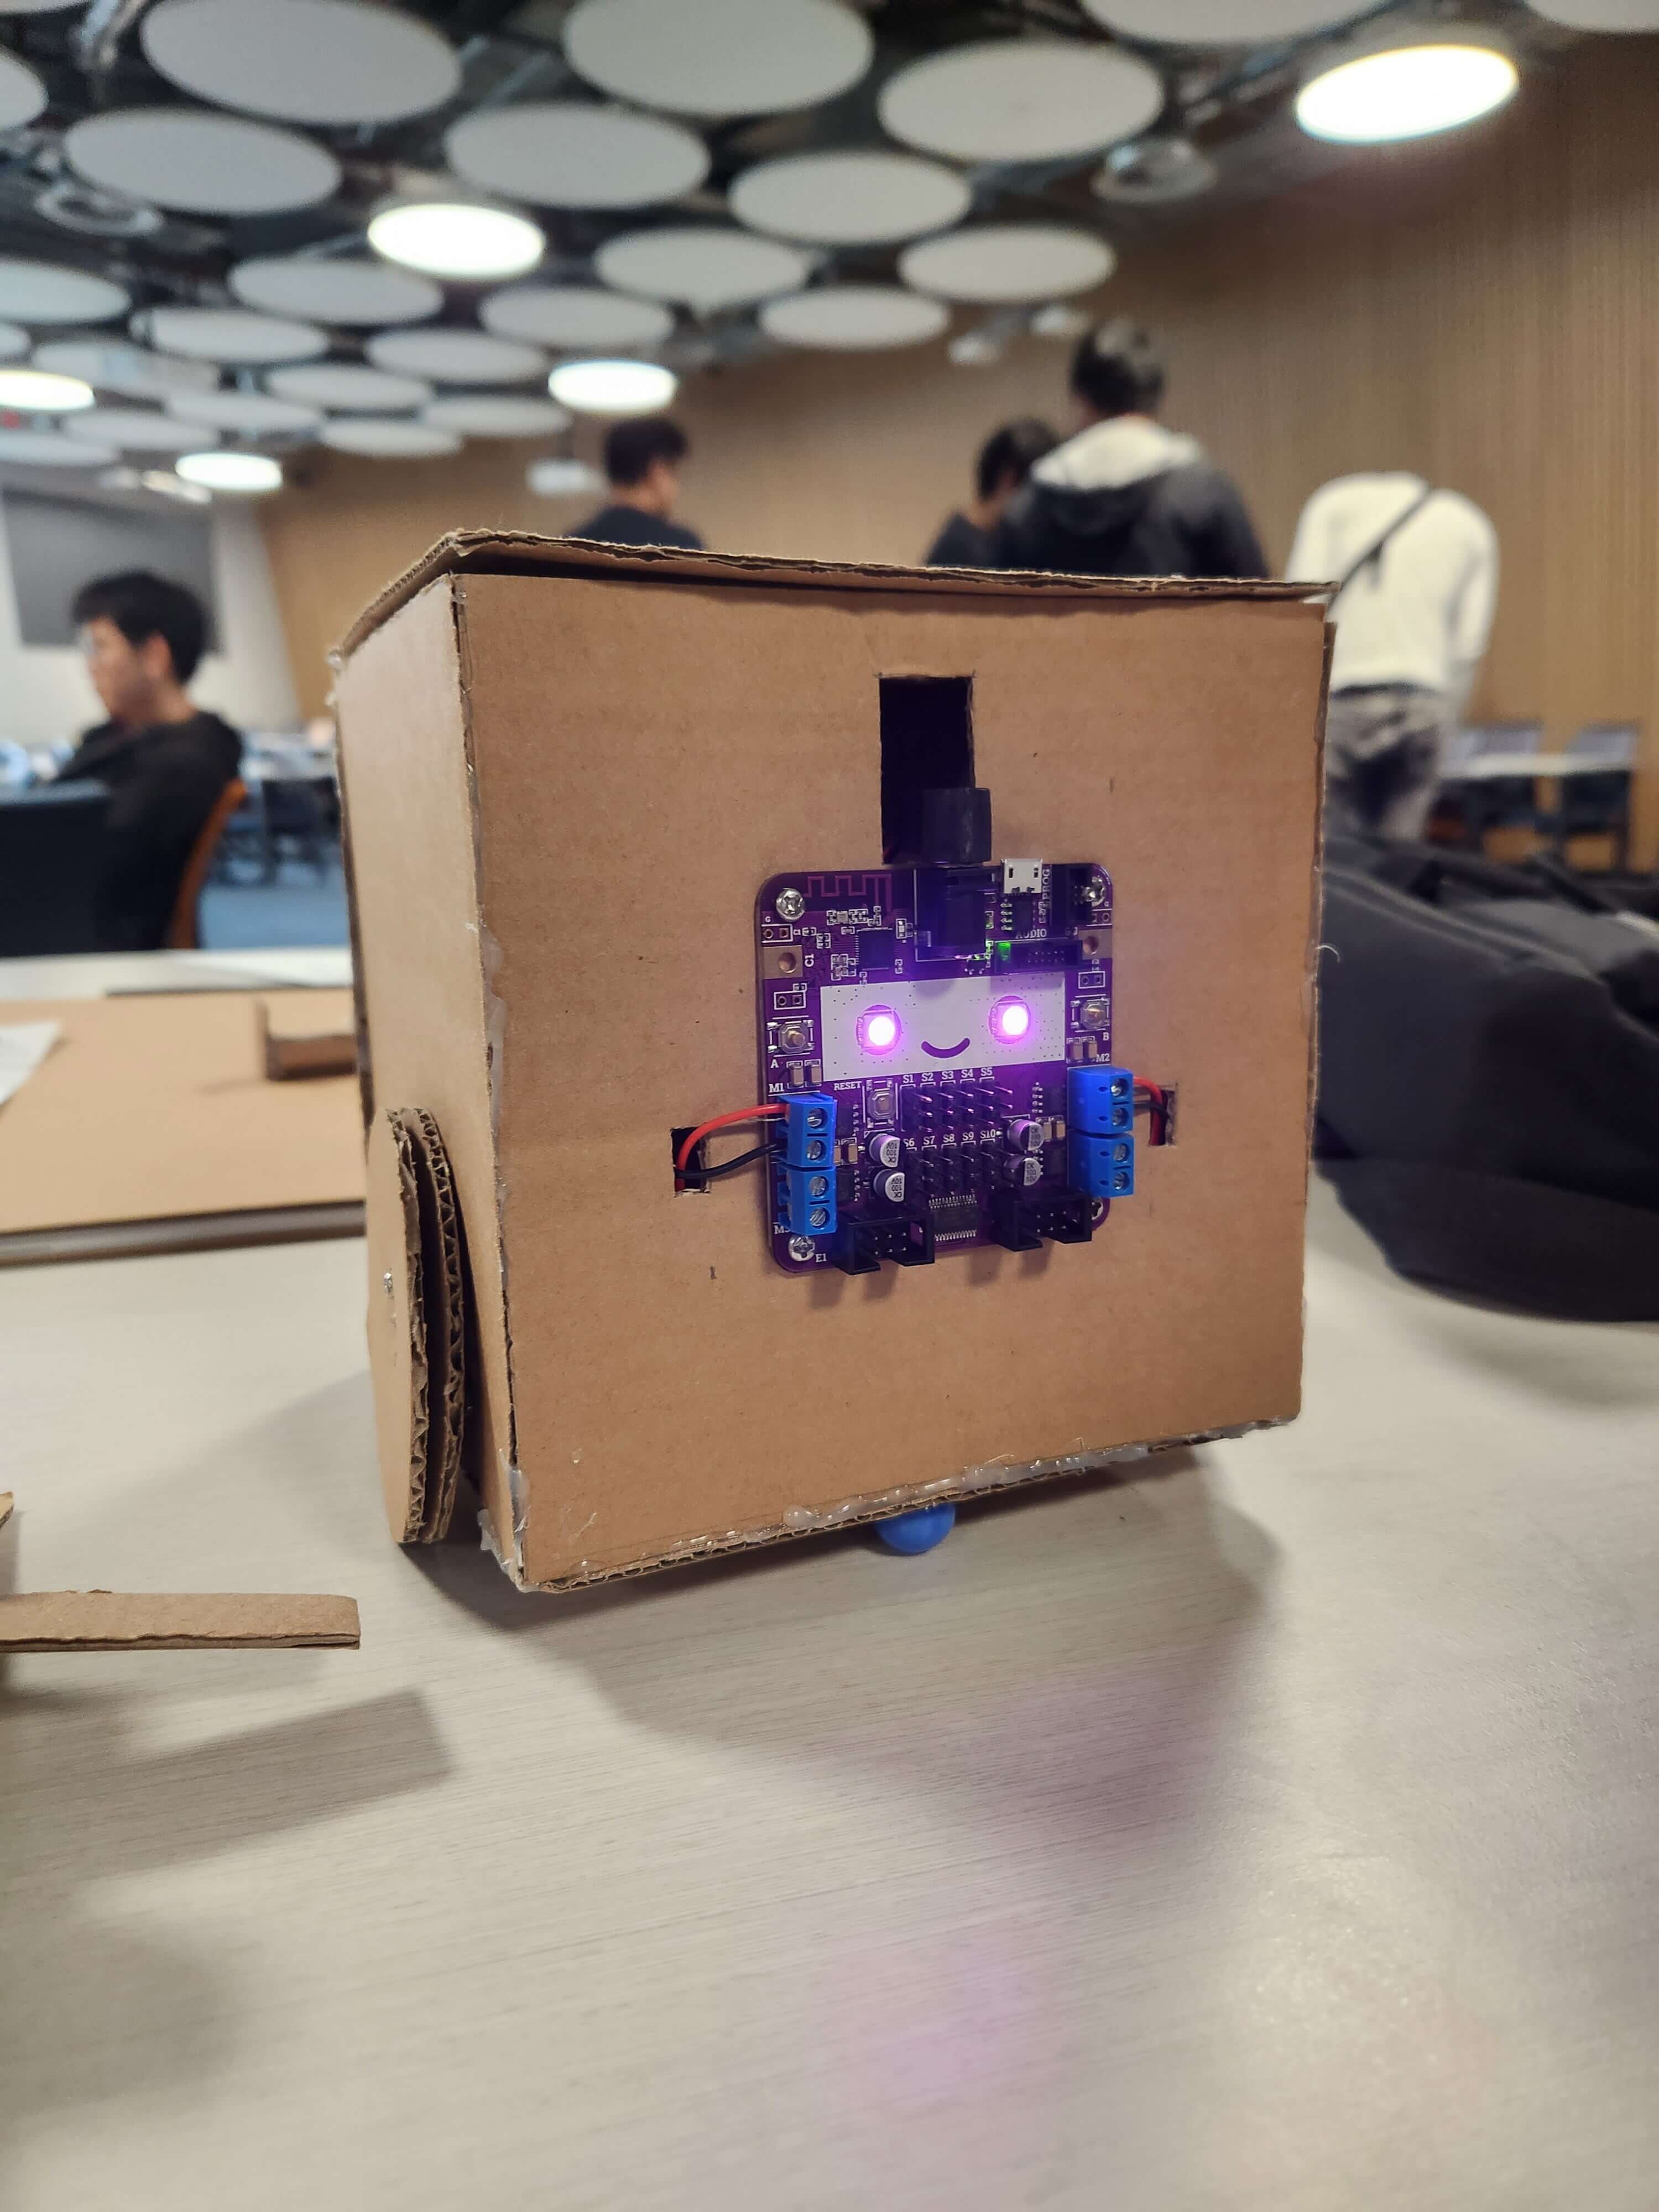
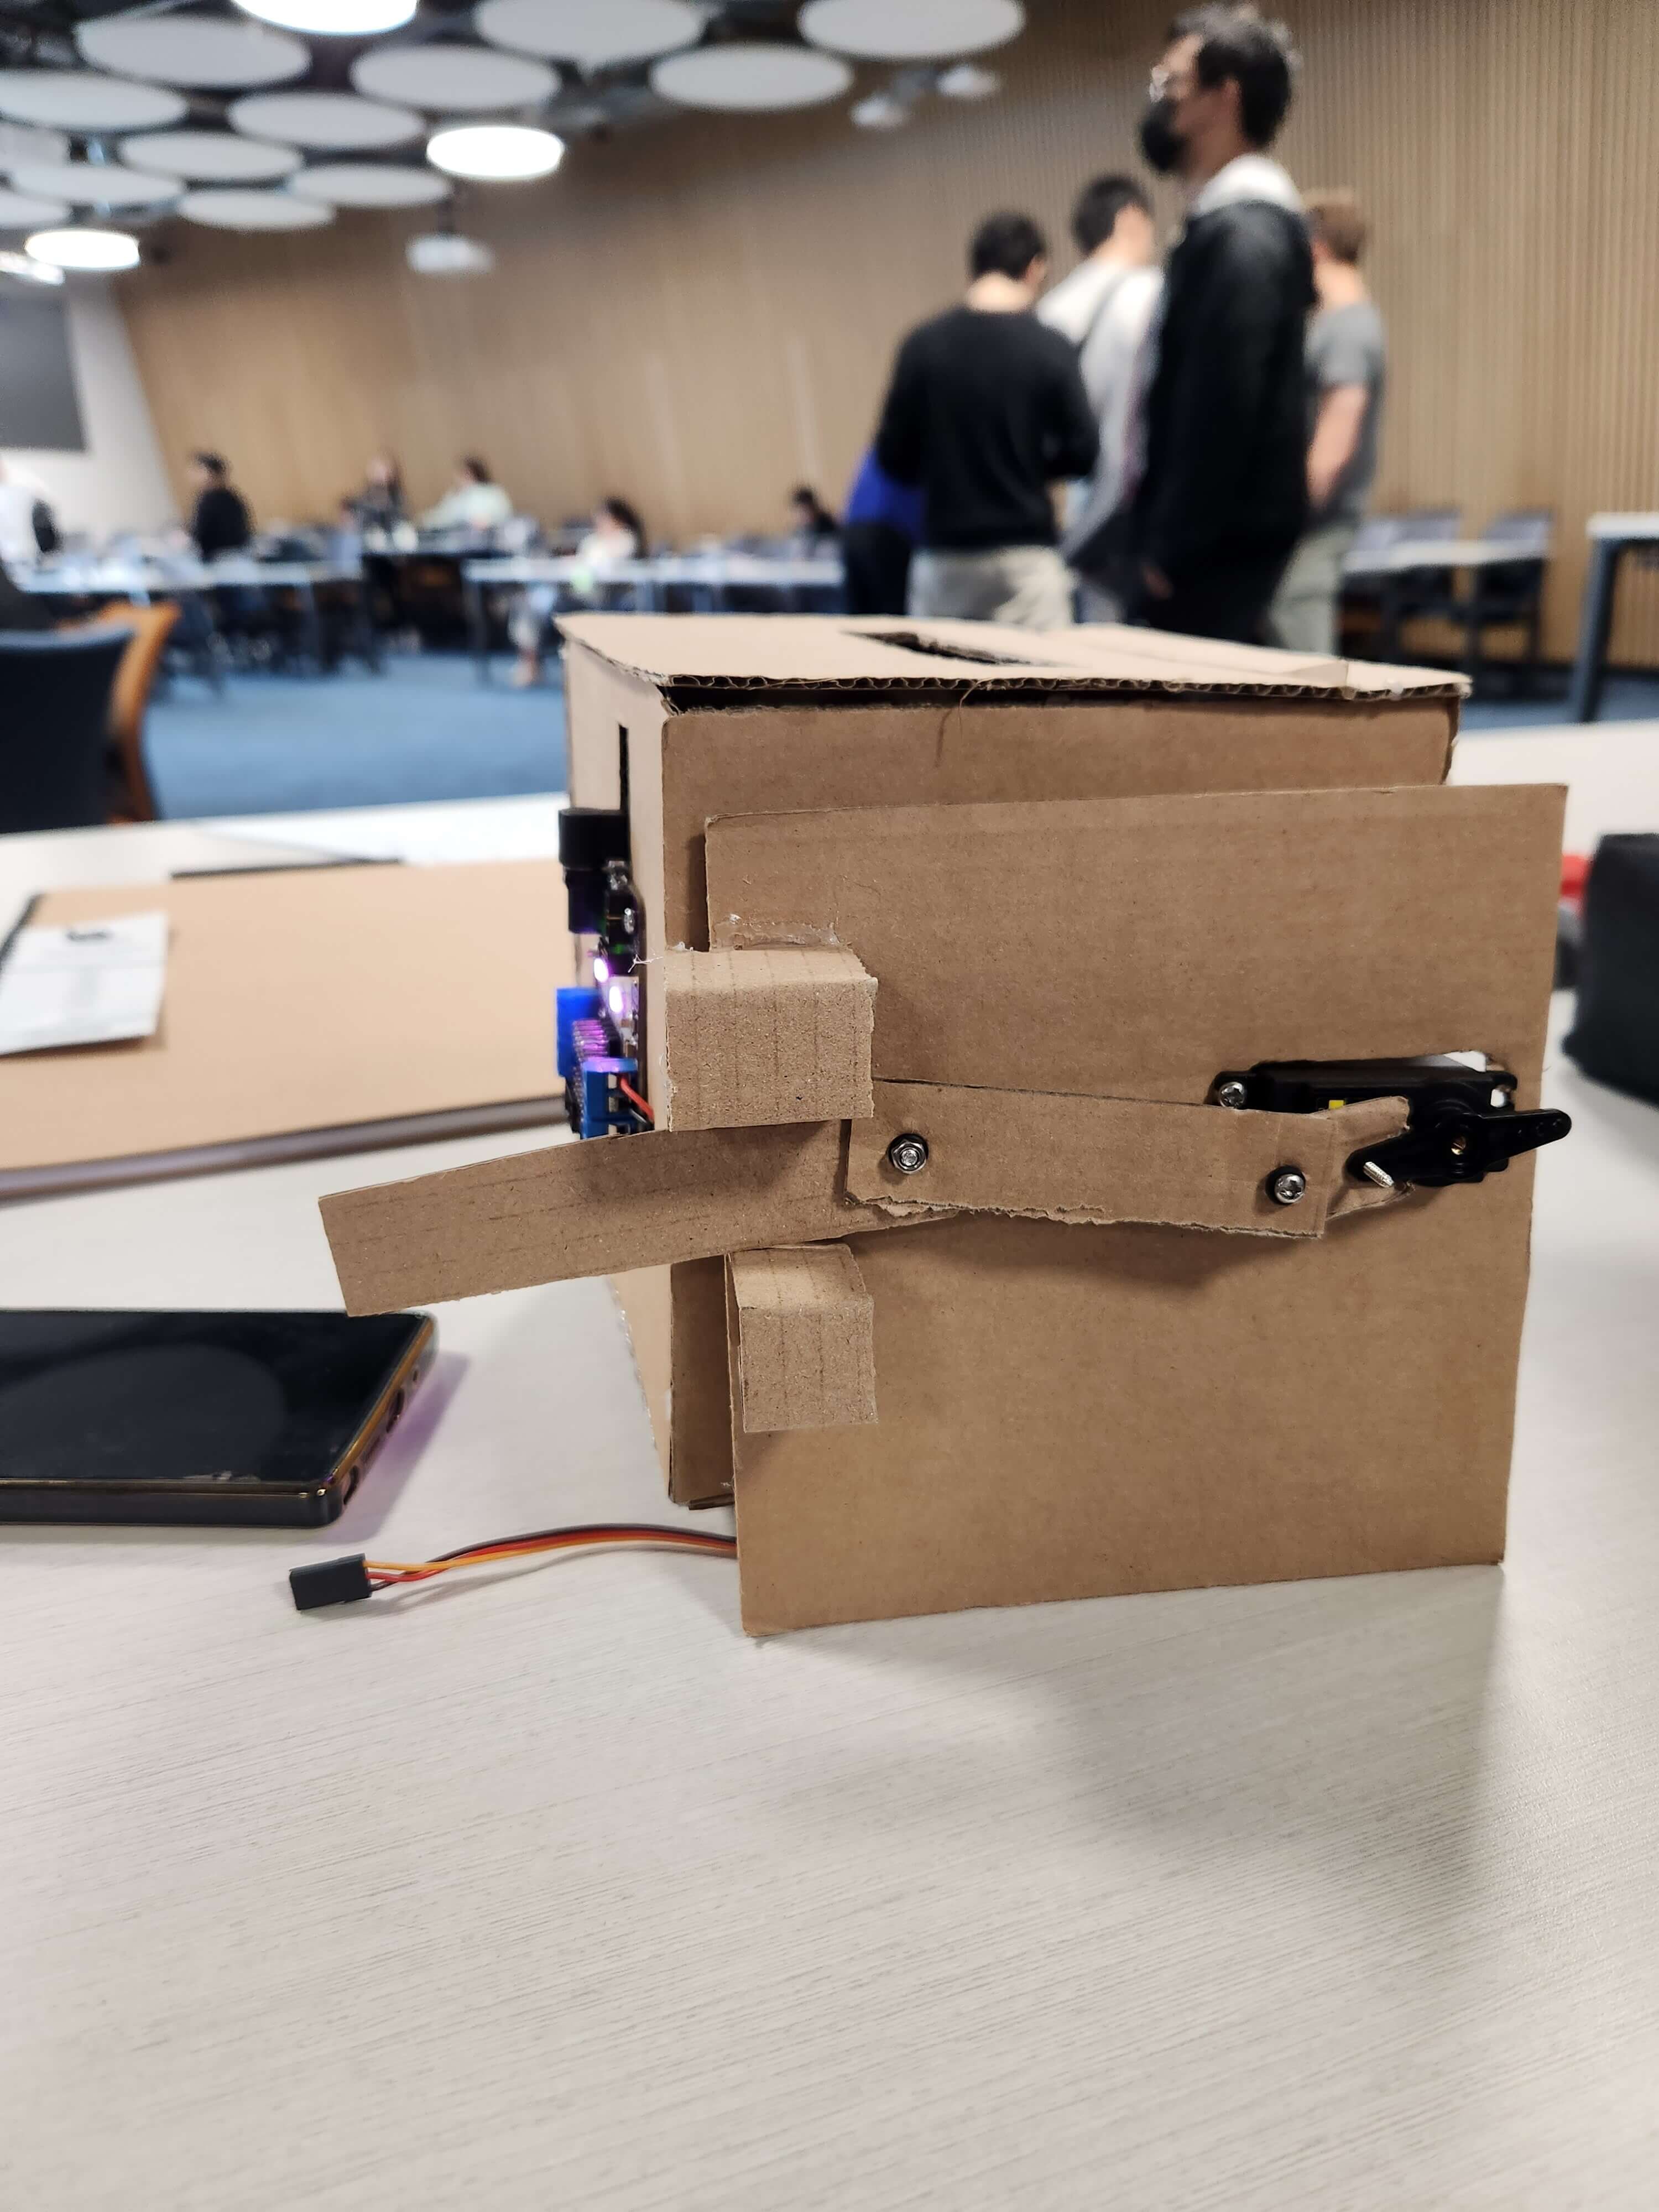
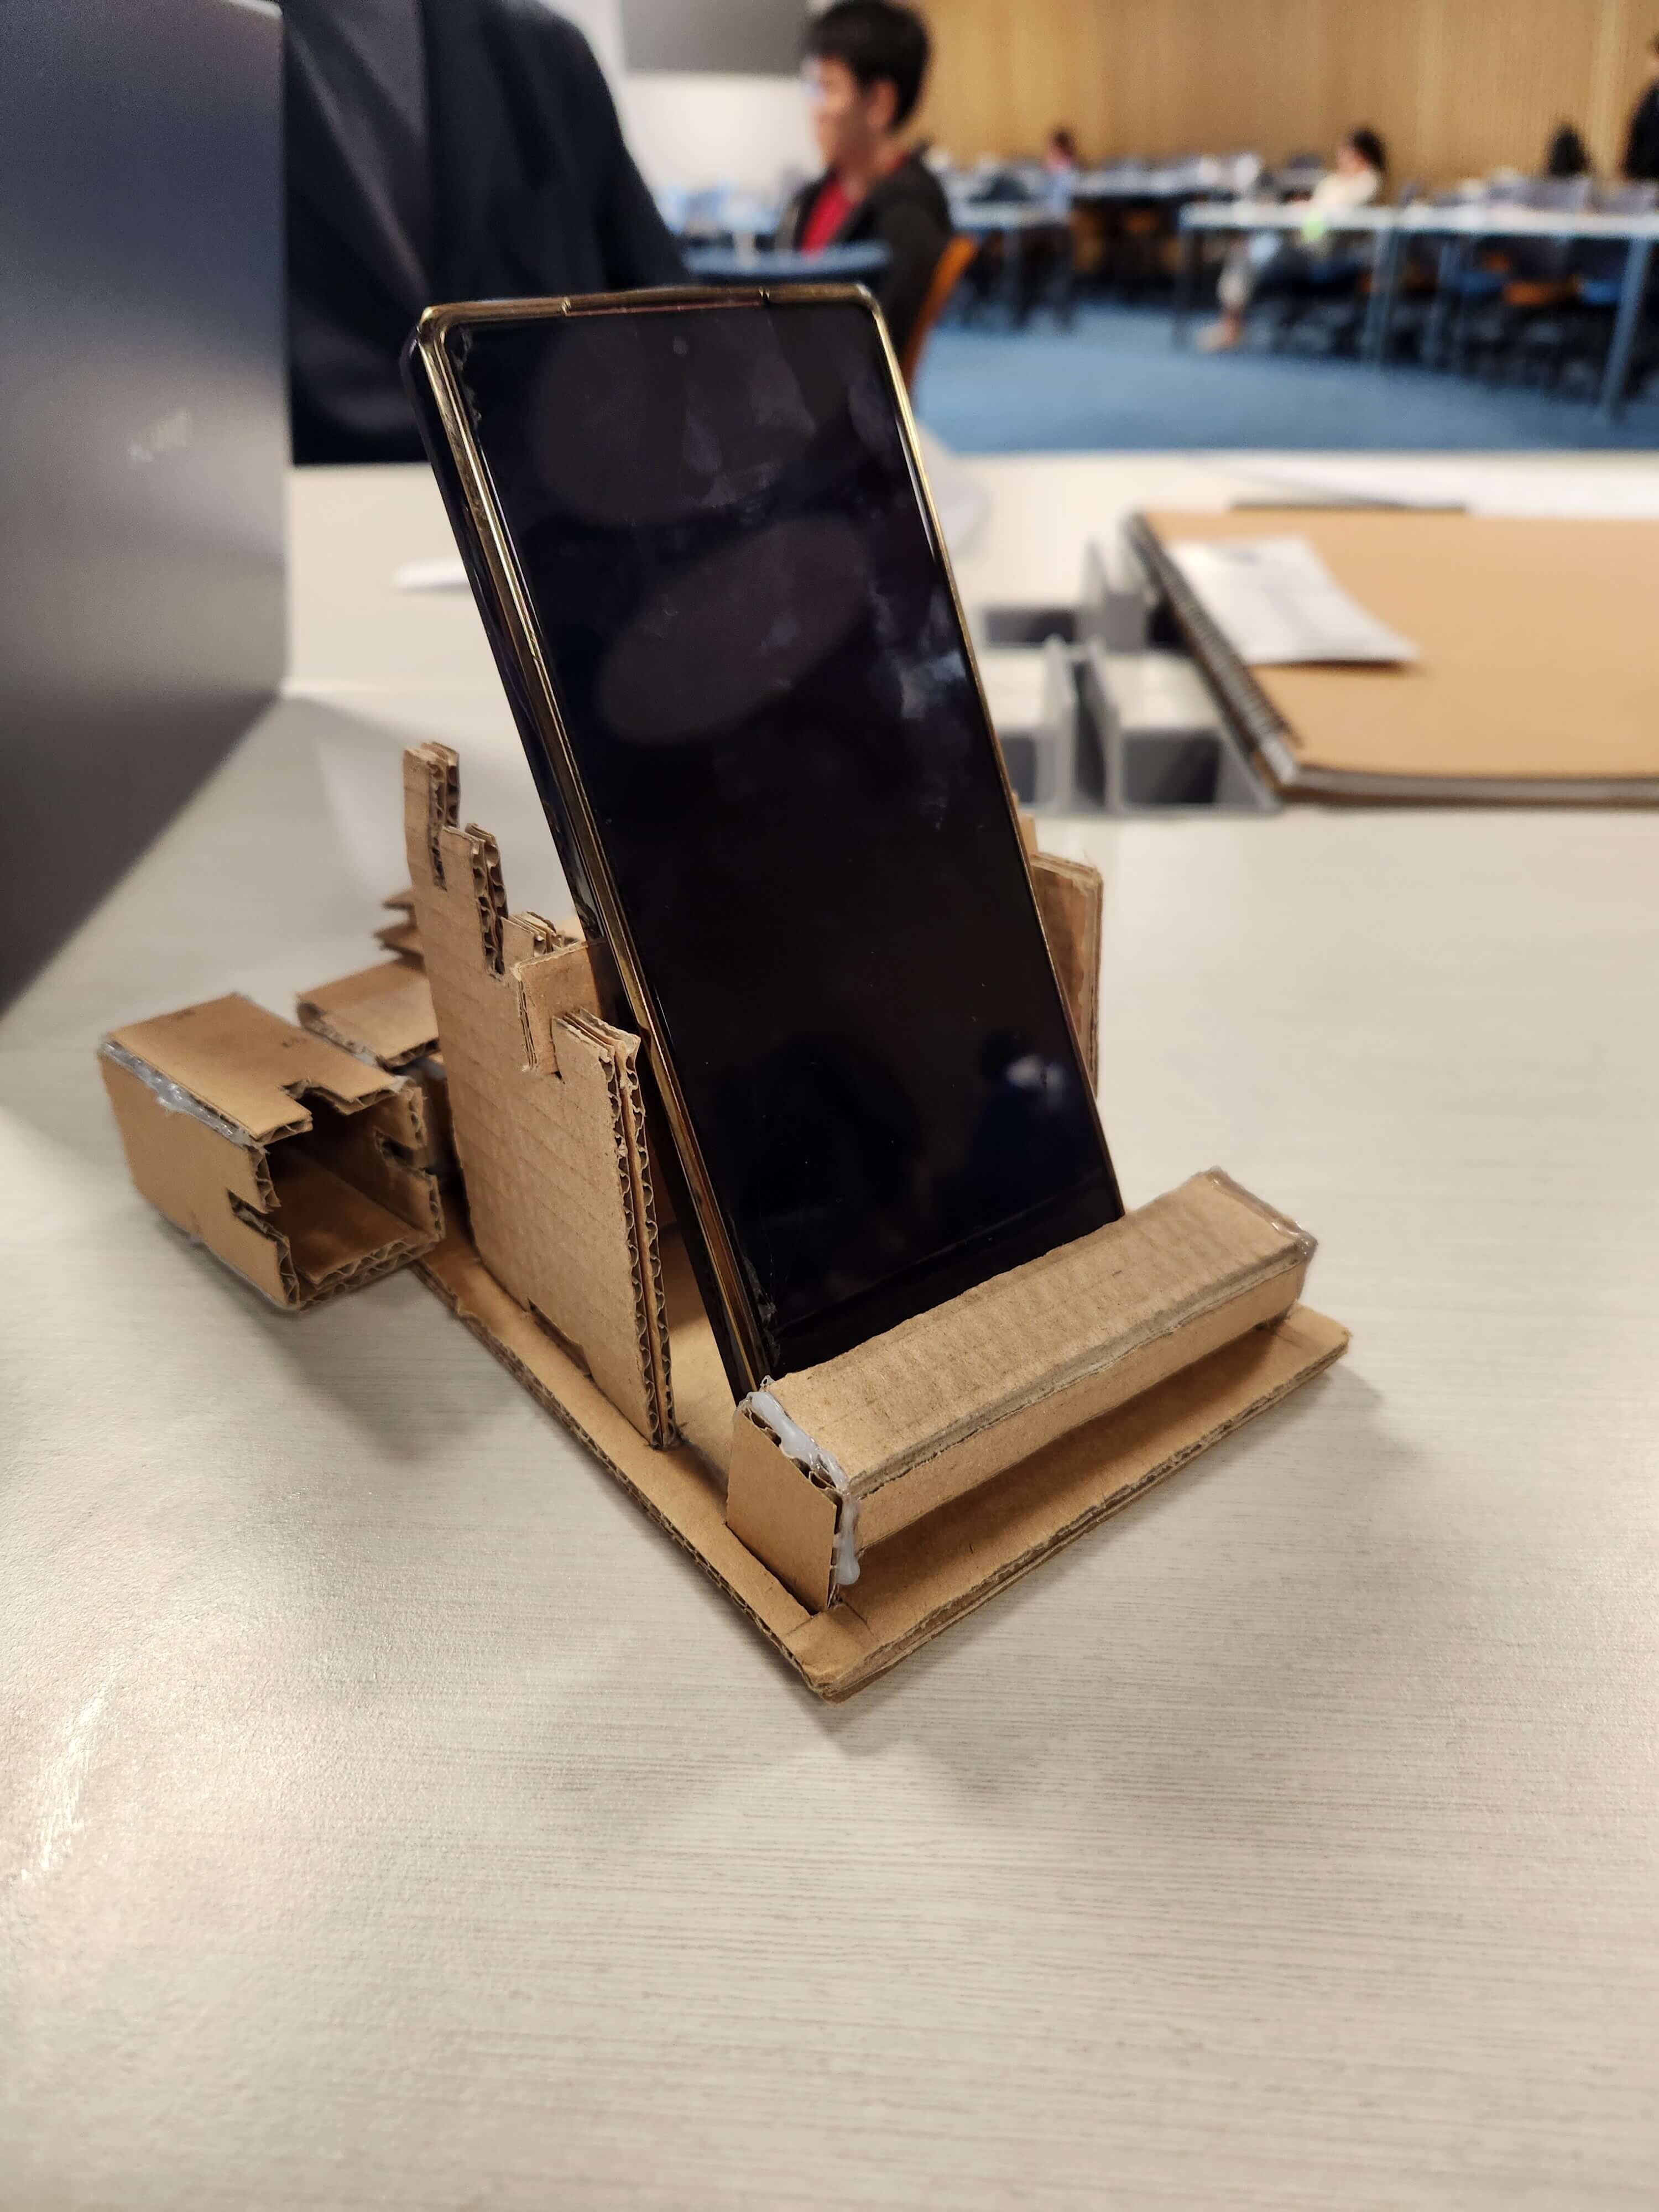
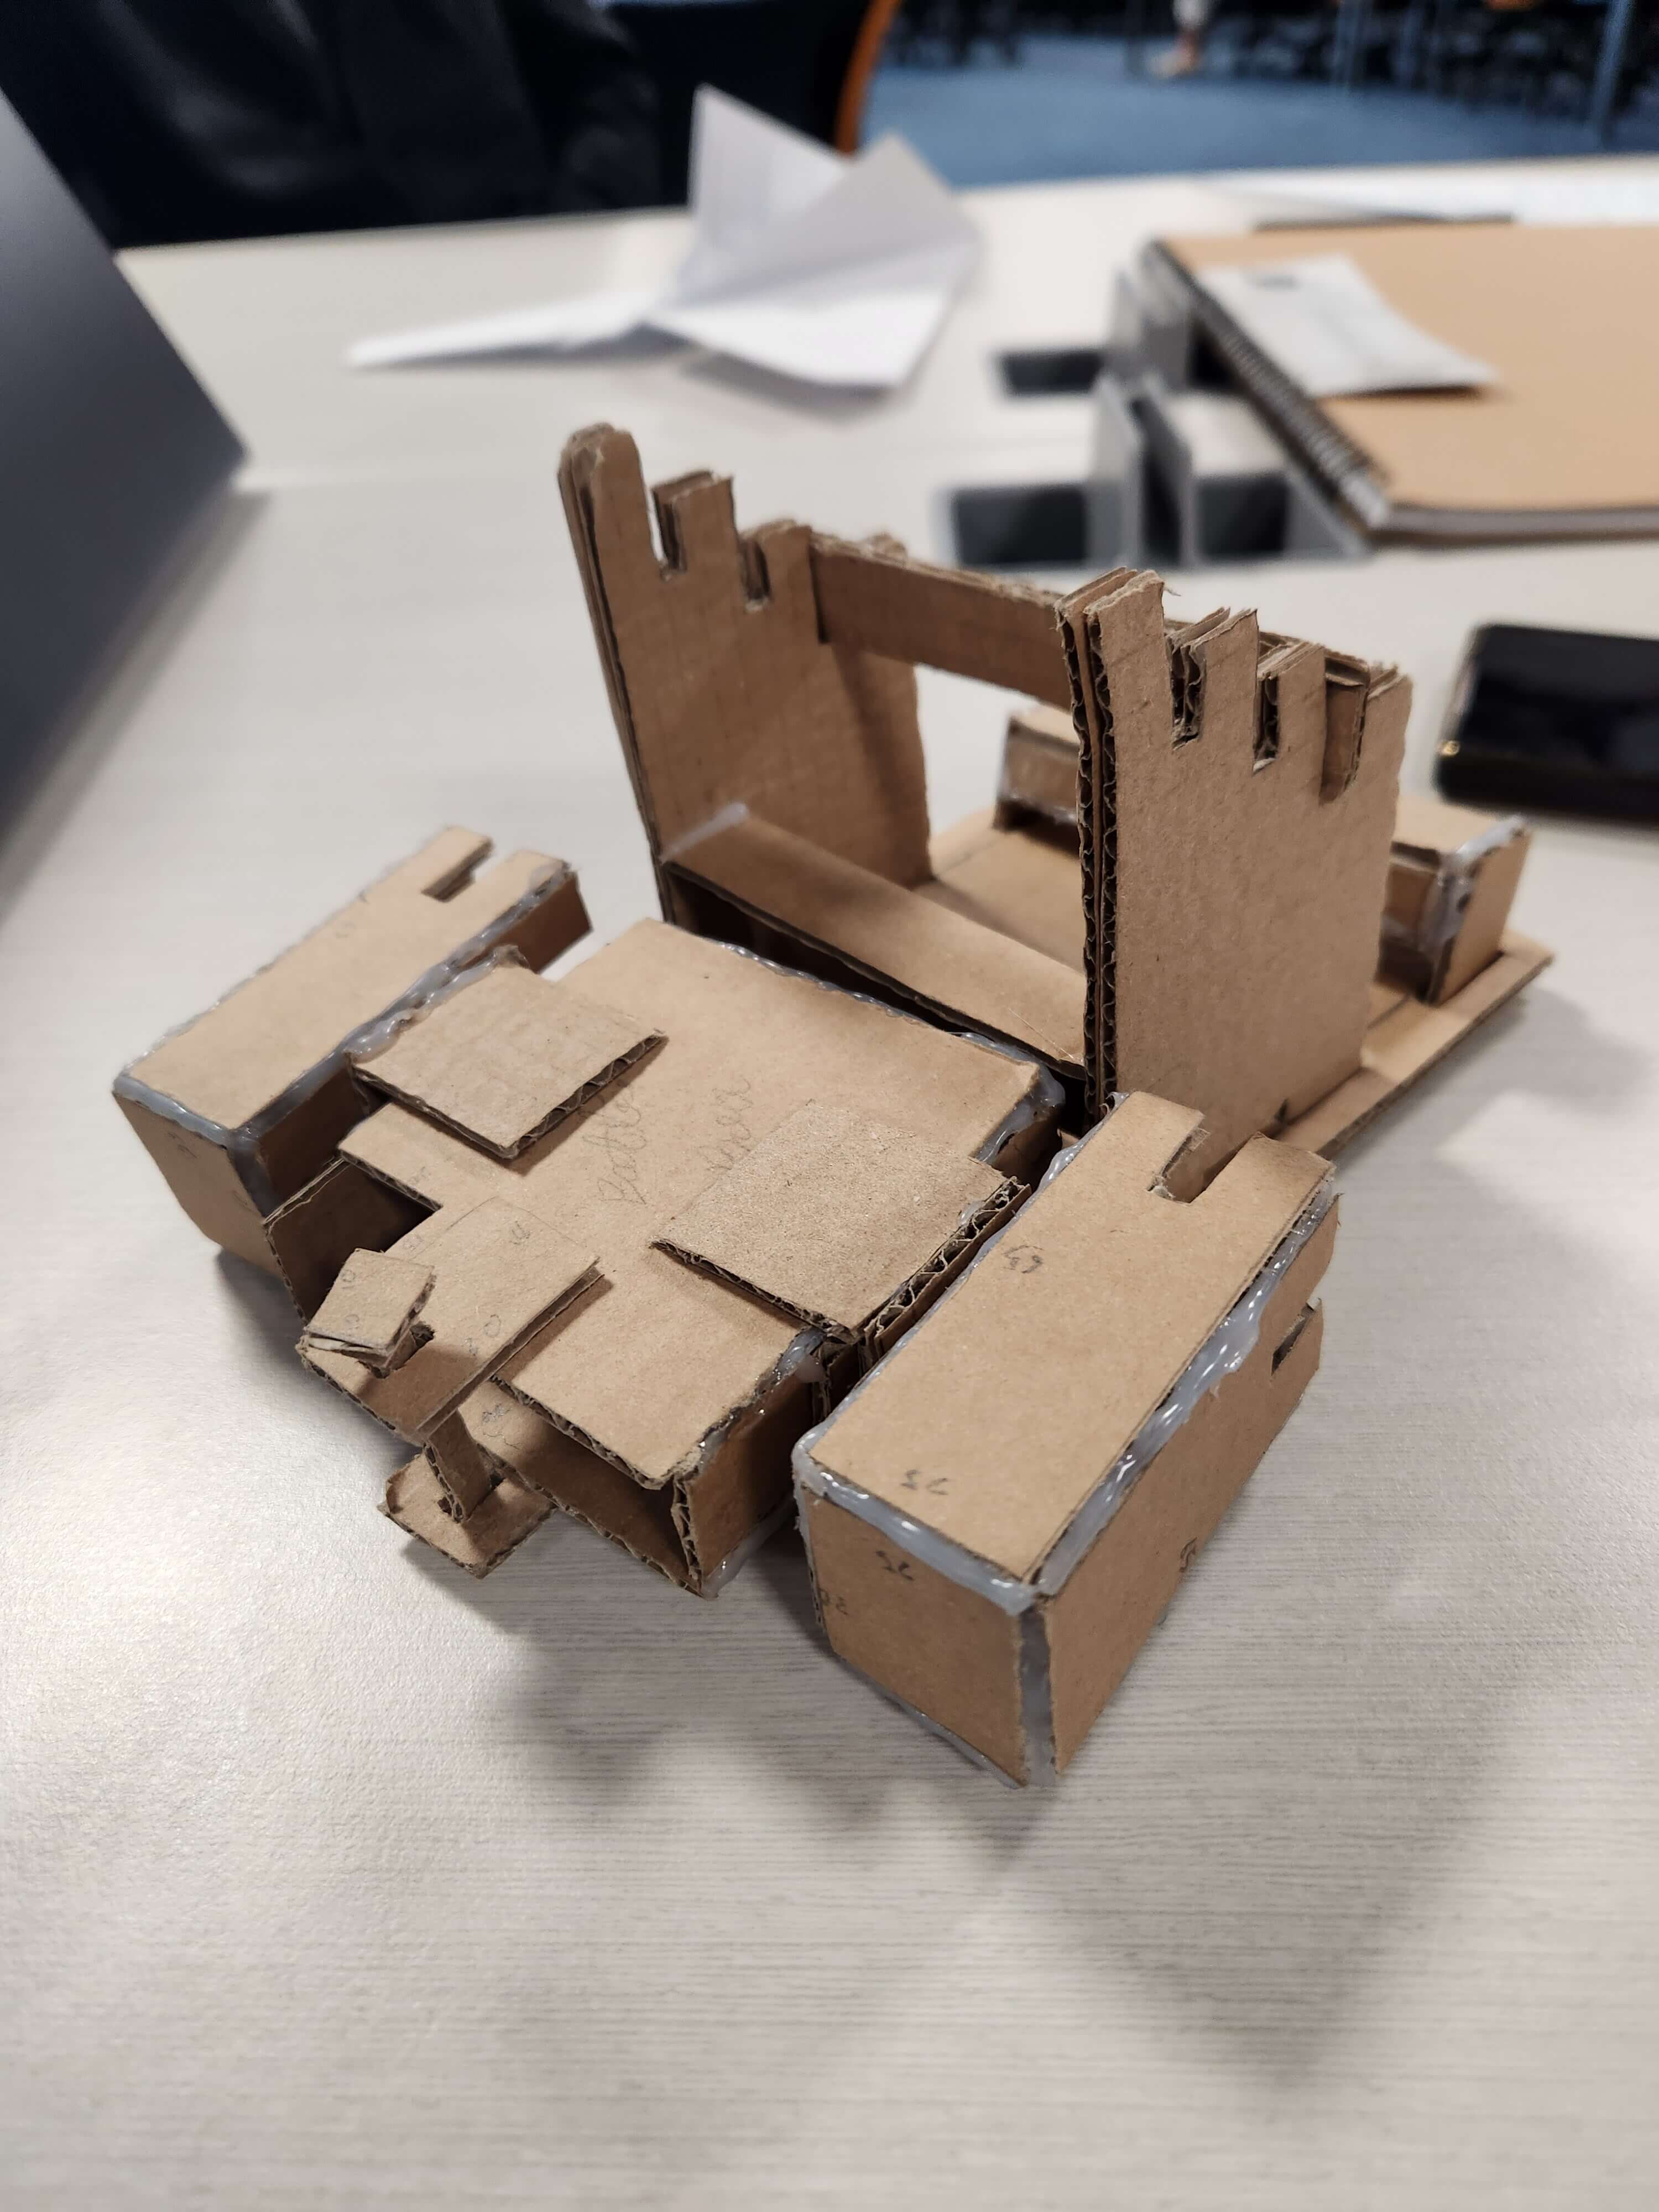
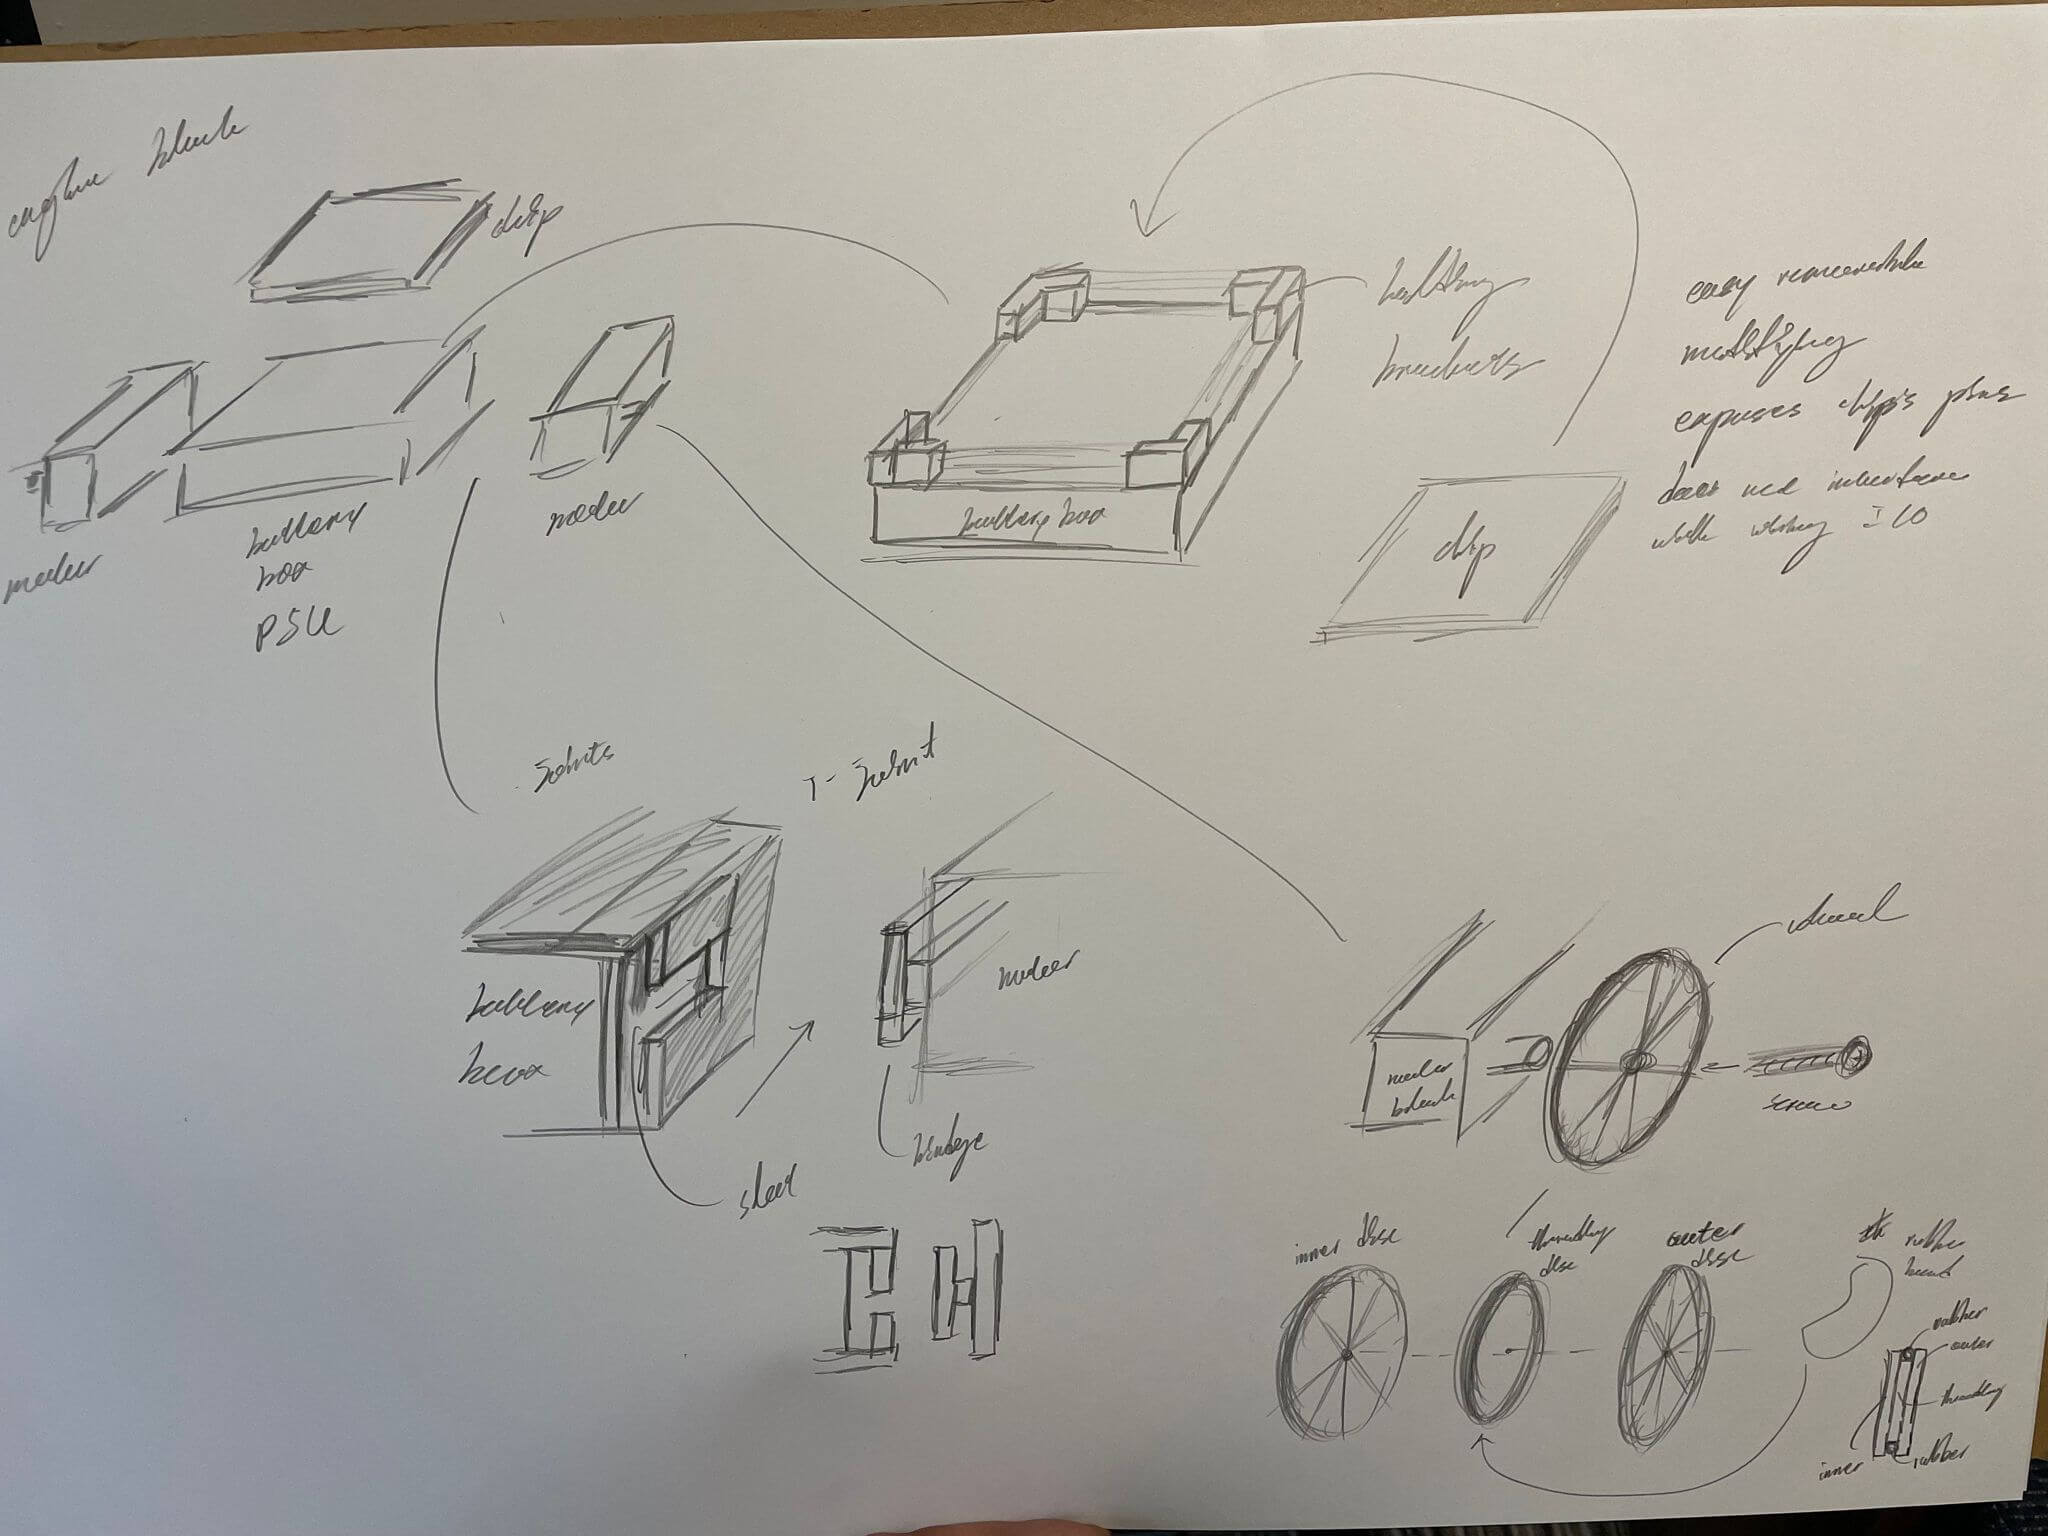
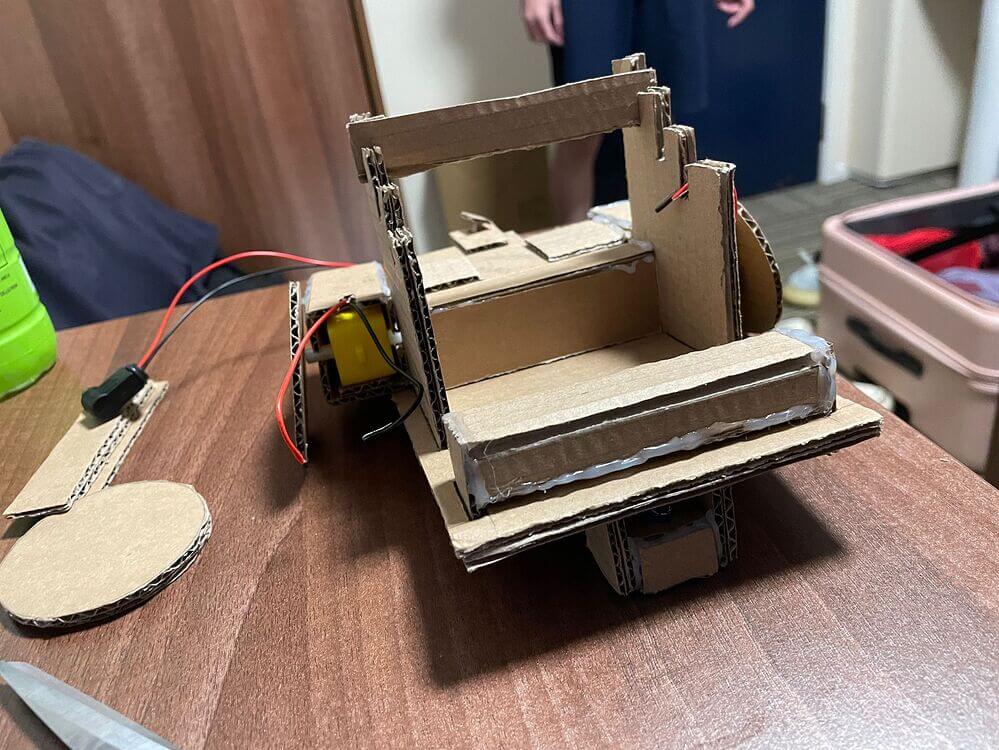
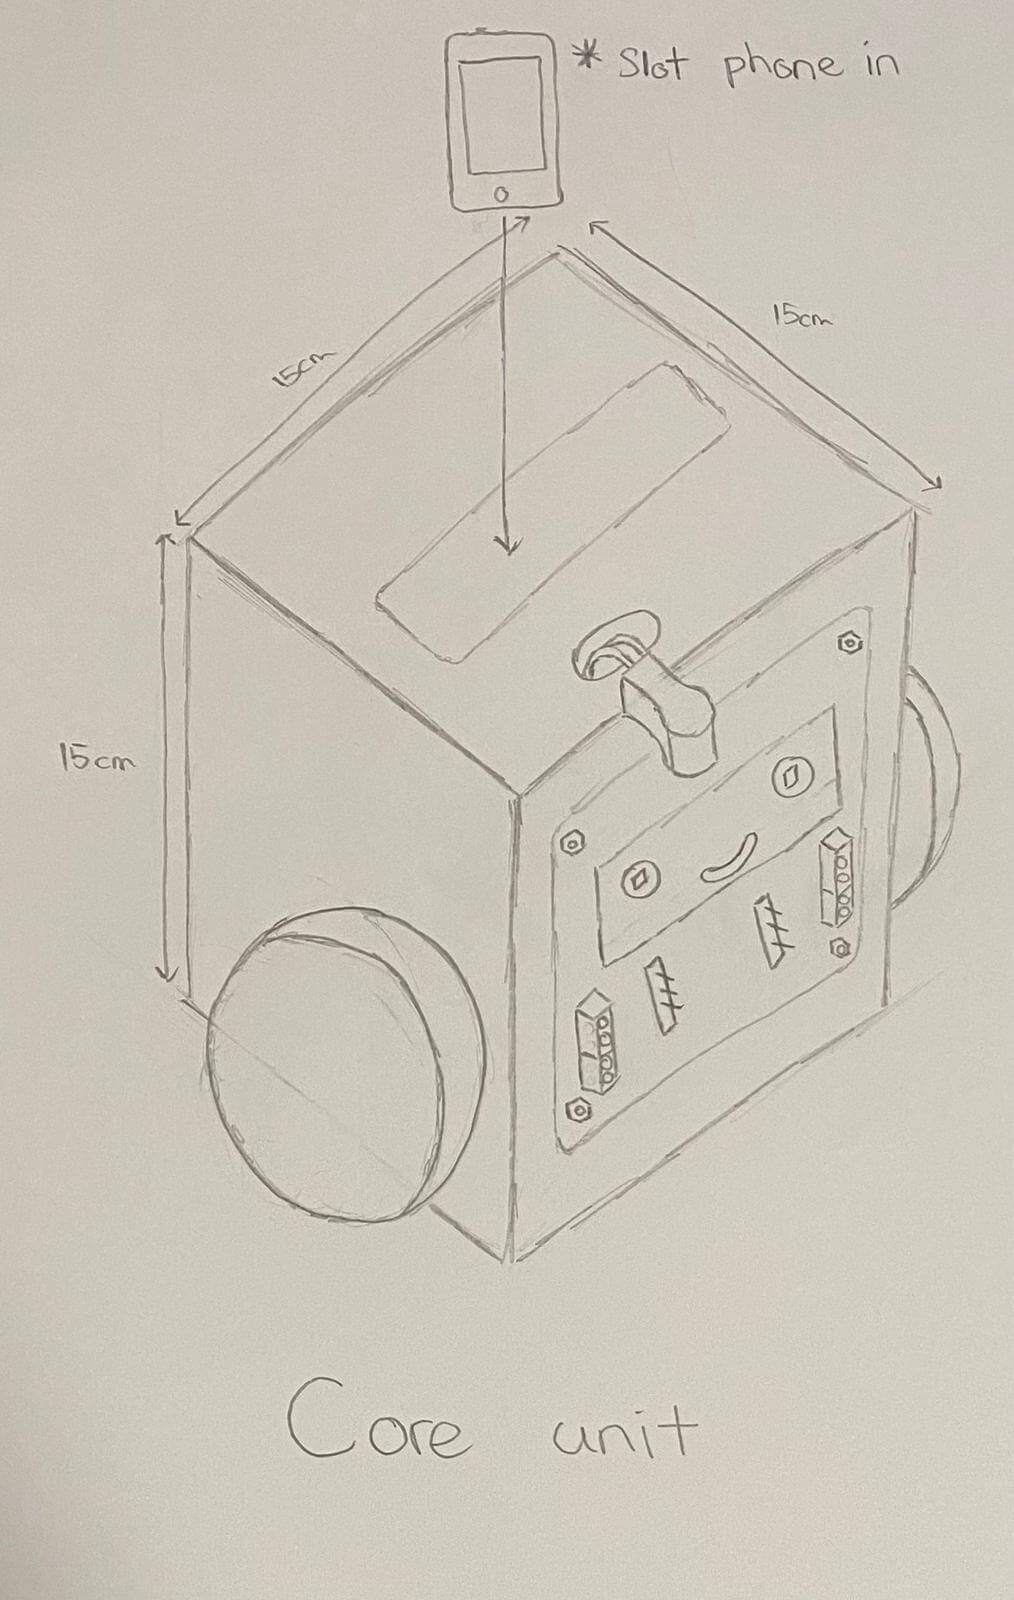
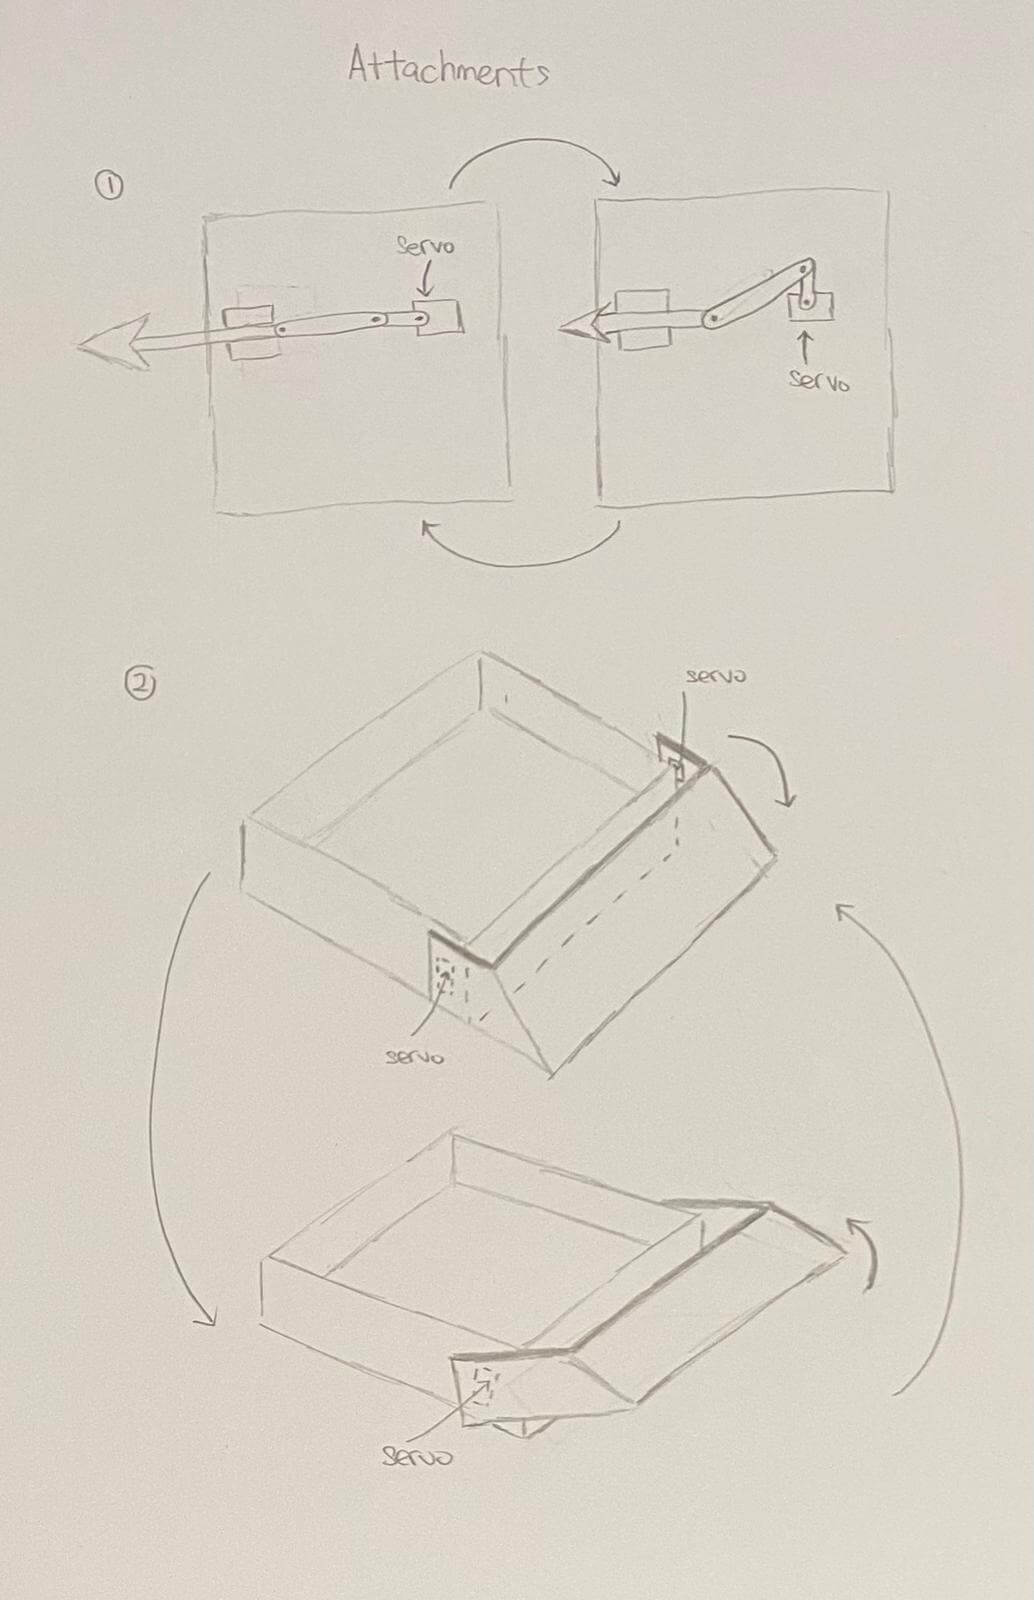
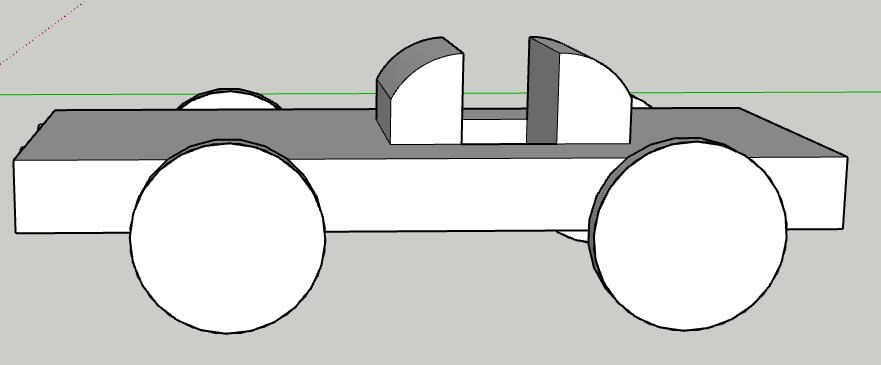
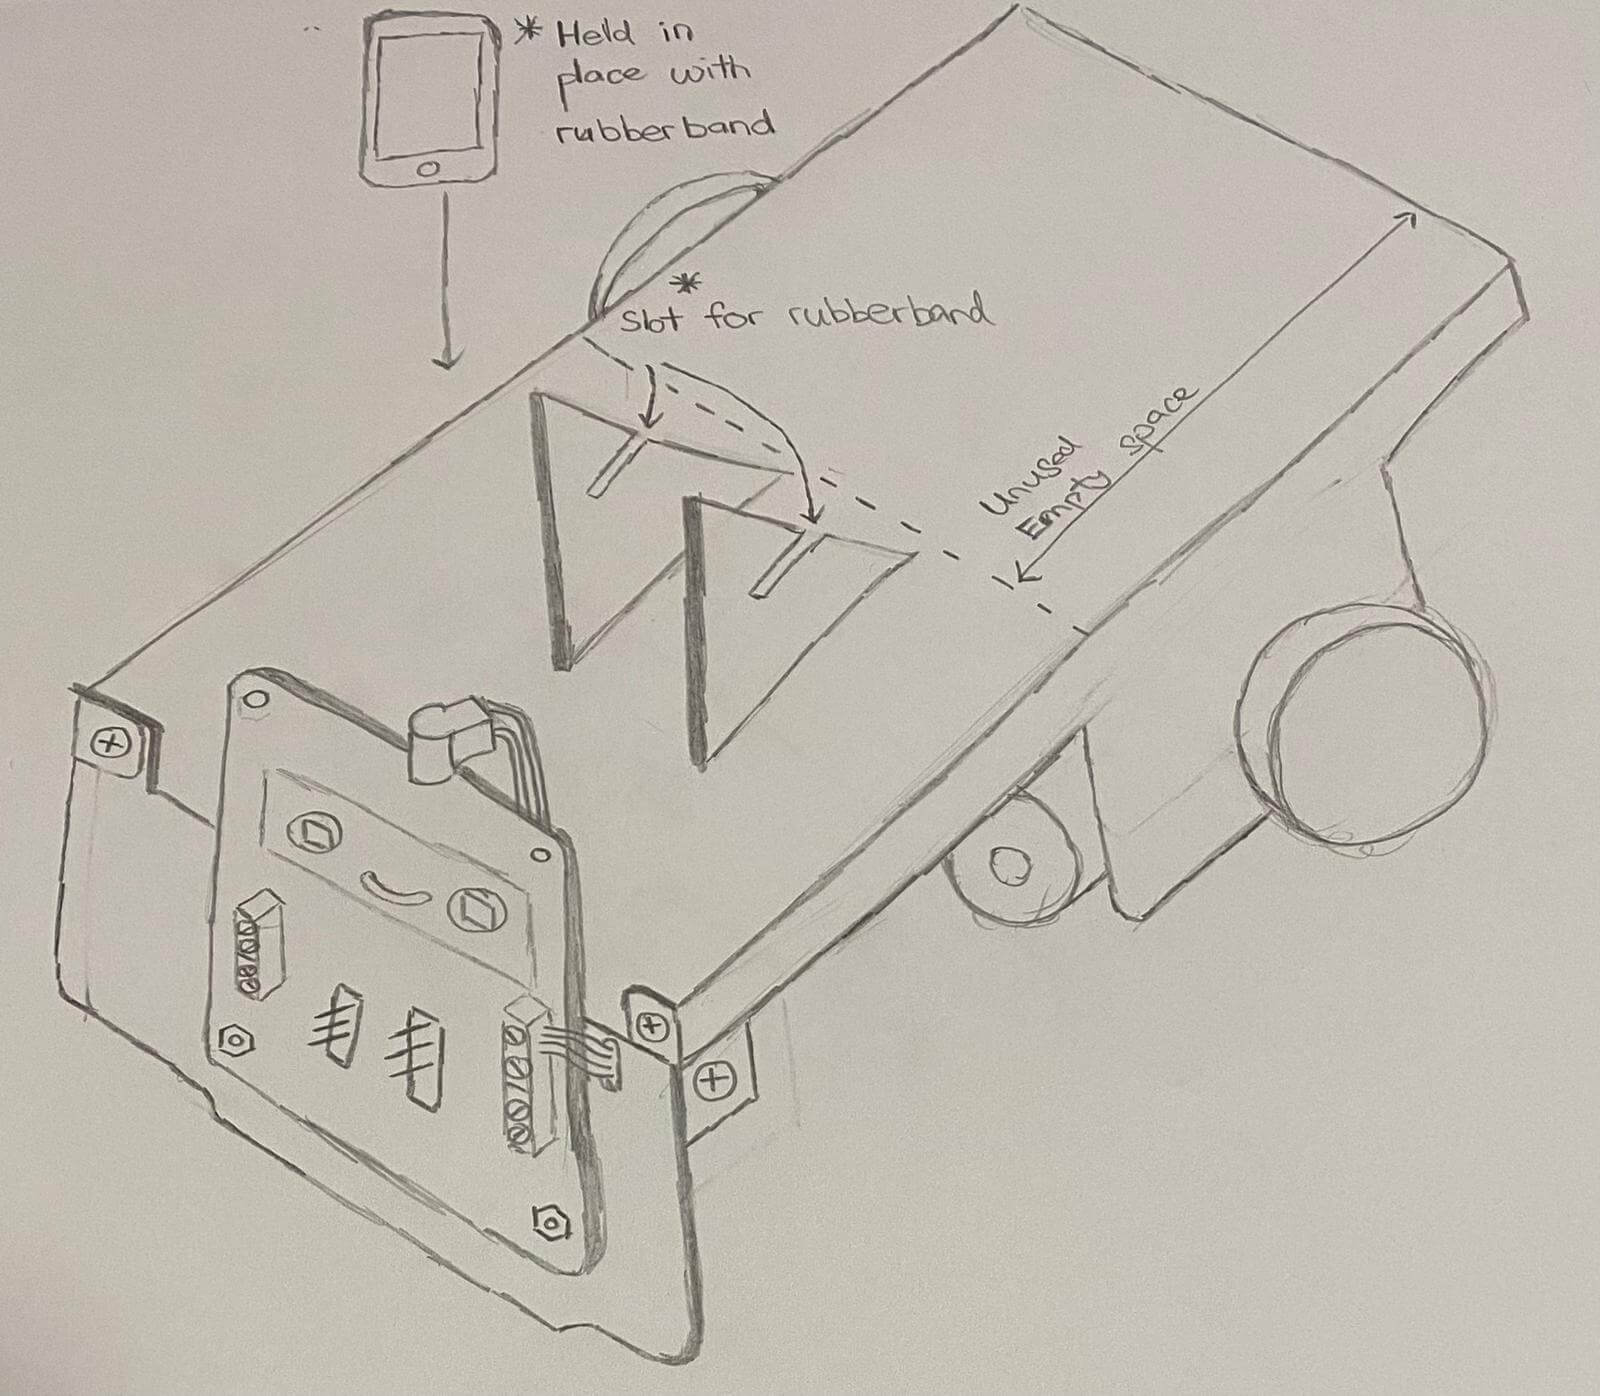
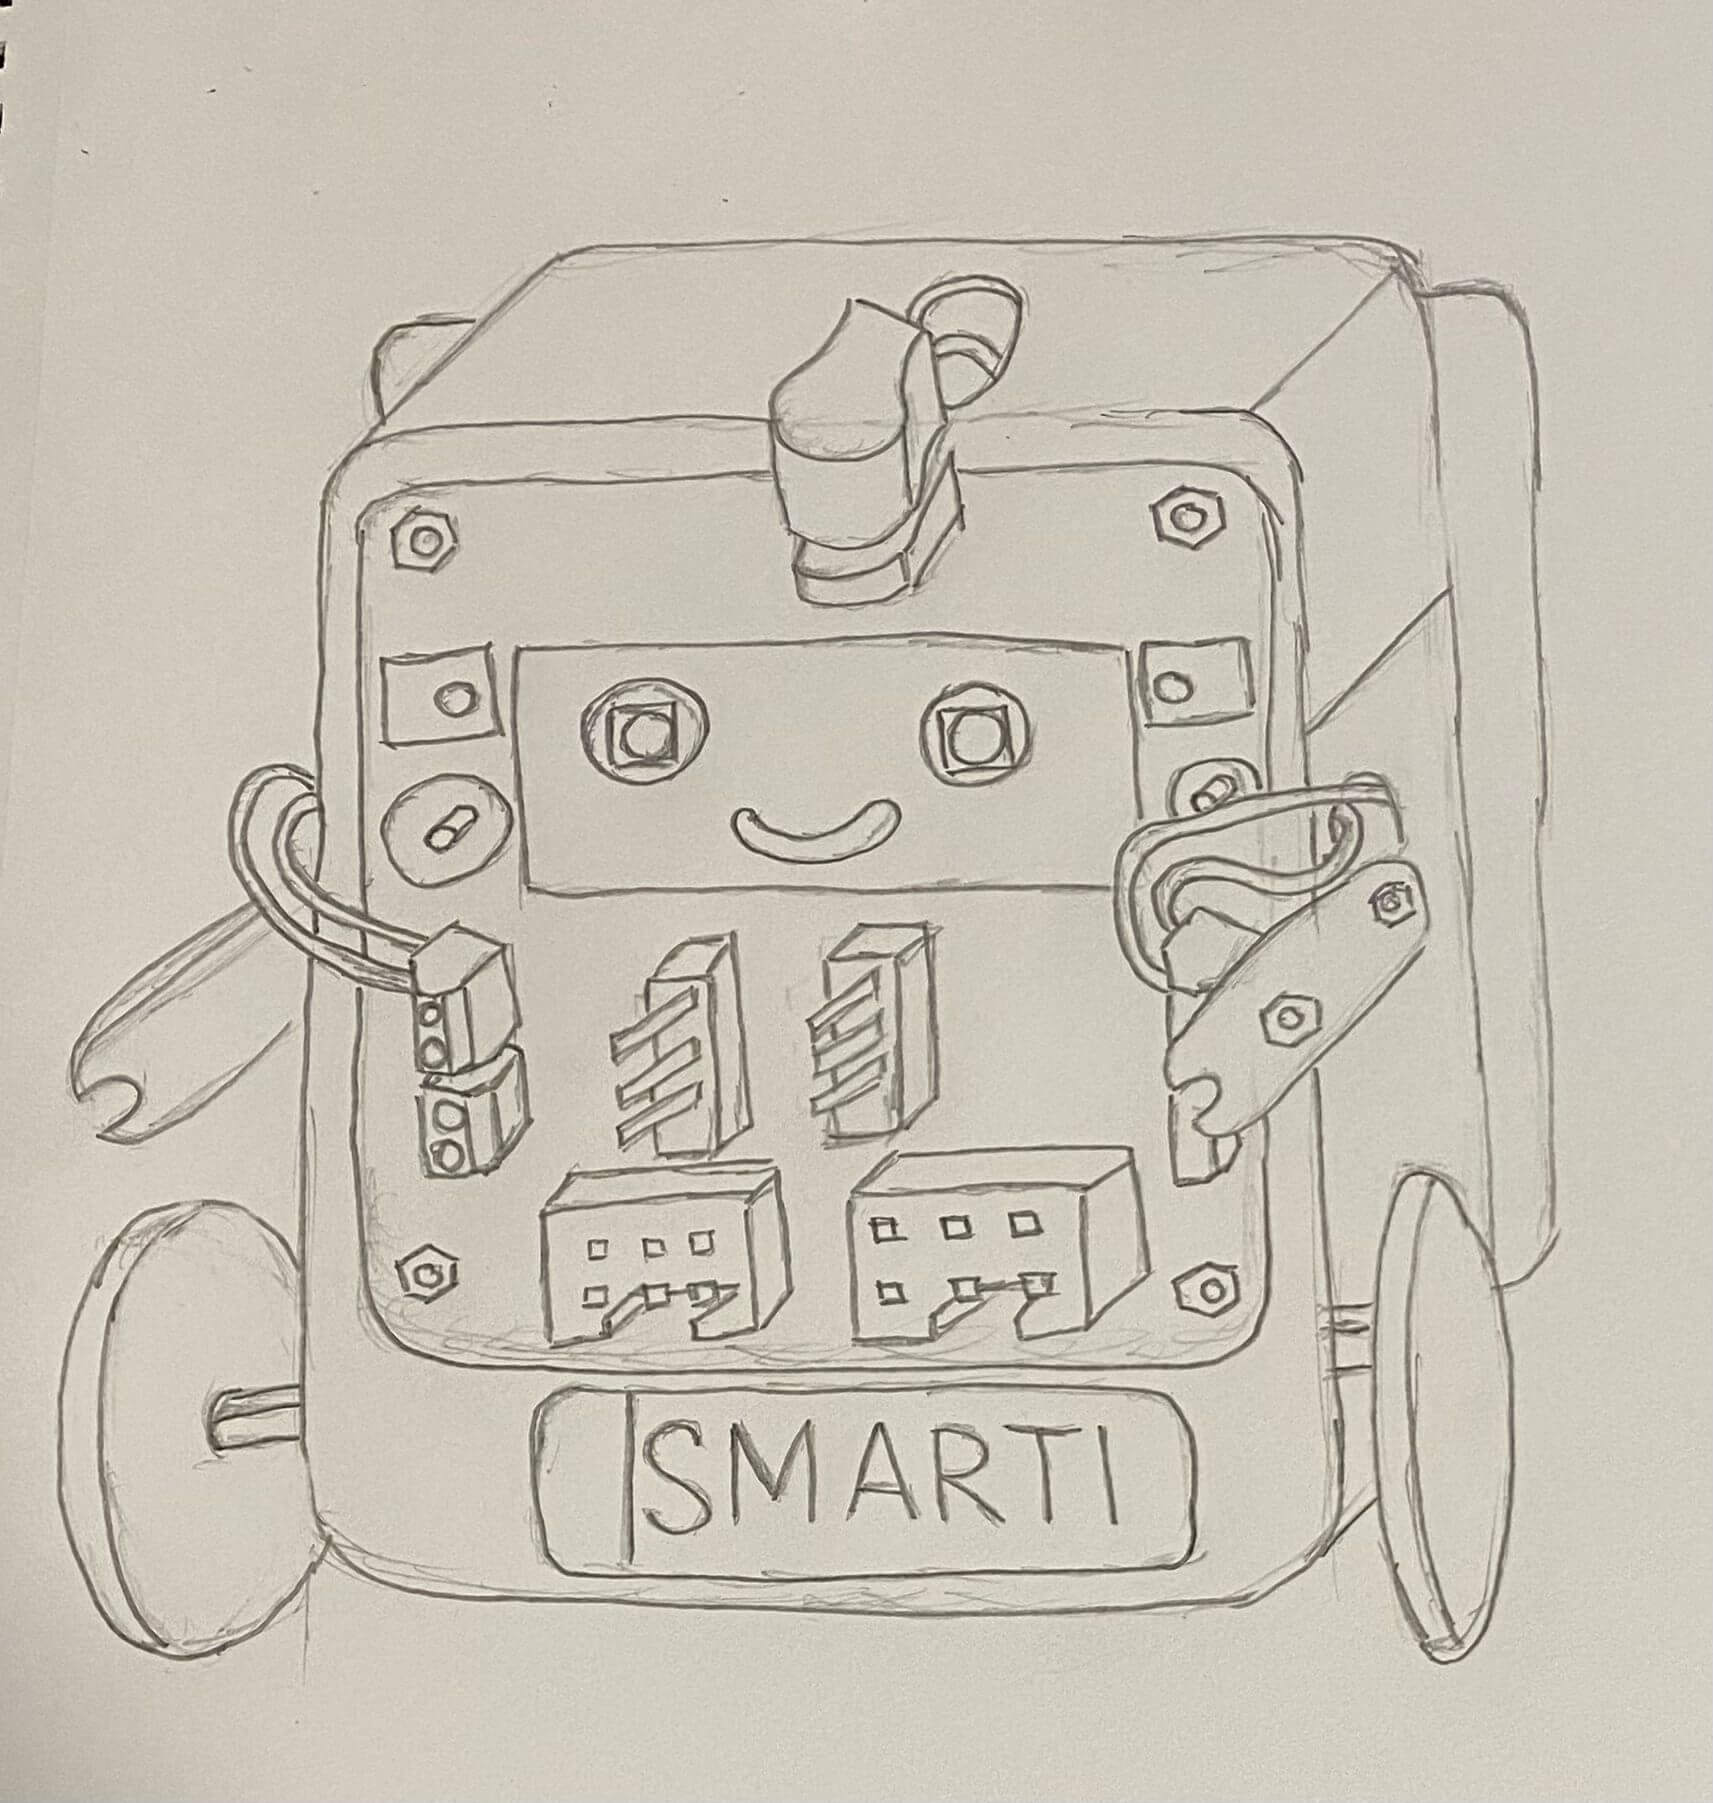
As we come to the end of the OIP, it’s a good time to reflect on our journey. This project has been an enlightening experience. It tested our creativity, our problem-solving skills, and most importantly, our ability to work as a team. Through the ups and downs, we’ve grown not just as individuals but also as a cohesive unit. Working on the project taught us the importance of user-centric design, adaptability, and iterative development. It pushed us to think outside the box, to innovate while also balancing practicality and feasibility. As we wrap up, we want to express our gratitude to our professor and peers for their guidance, support, and constructive feedback throughout this journey.

· 2 min read

Today’s Progress:

Exhibition Day:

The team had the unique opportunity to present our project, Educraft, at the ARC exhibition. Our chosen prototype to display was the BattleBot version of Educraft, as we felt that it would be engaging for the visitors, especially during the hands-on practice sessions.

Challenges: Initially, we faced challenges with our stand placement, located in a less visible corner of the exhibition. However, this turned into a blessing in disguise as the movement of our BattleBot across the floor piqued the curiosity of the attendees, drawing them towards our corner to learn more about our project.

Visitor Engagement: Our stand became a bustling point of interest, with visitors keen on learning about our goals and the features we worked on to improve Curio and turn it into Educraft. One notable interaction was with a primary school teacher, who found it intuitive to set up the BattleBot version of Educraft in just 10 minutes. The step-by-step guide was simple enough for his students to follow. He also expressed interest in letting his students play around with it and was concerned about whether there might be complex coding required that could be a little too advanced for them. However, seeing how easily configurable it was on the app for setting up, he was reassured about its simplicity and had fun playing around with the robot.

Peers’ Interest: The high level of engagement at our stand didn’t go unnoticed by partners from other teams. We received positive feedback, particularly about our vision of promoting affordability through the use of sustainable, everyday objects. Observing Educraft’s performance throughout the exhibition, they were impressed with its durability and speed.

Learning Opportunities: The exhibition provided a rich opportunity for gathering real-time feedback, furthering our understanding of user interactions and needs. It will also be beneficial for the team to continue improving Educraft as part of the design process.

Final Reflection: The exhibition was not just an opportunity to showcase our work but also a learning experience. Seeing people interact with and enjoy Educraft was gratifying and a testament to the hard work and dedication our team put into the project.

· 2 min read

Today’s Progress:

Consultation Progress:

We had a constructive consultation session with our professor, focusing on feedback from our video pitch. Below are some of the key takeaways:

  1. Website Instructions: The professor agreed with our approach of adding assembly instructions to our website. We will continue to enhance the clarity and user-friendliness of these instructions.

  2. Battle Bot Explanation: We were advised to clarify the functionality of our battle bot concept in the website. For example, is the aim of the battlebot to topple another robot? By adding some visual cues such as adding a marker at the end of the arm of the battlebot to show the other battle bot being hit would be helpful.

  3. Narrative & Context: The professor emphasized the importance of providing a clear narrative of what our robot is built for, including an explanation of our design thinking process. For example, we should illustrate how the battle bot is designed to topple other robots.

  4. Website comments: We were advised to look at landing page designs that prominently feature the final product and its video demonstration.

We have also included some images of the prototypes that we have done:

Prototype 3 (Battlebot):

front-dailies

side-dailies

Prototype 4 (Modular Design):

phone-stand

disassembled-dailies

disassembled2-dailies

· 3 min read

Today’s Progress:

Website Development and Usability Testing:

We made some modifications on our website after conducting usability testing and incorporating feedback received. The website can be accessed here: [Curio](https://design-and-innovation-2023.github.io/Team10B/

Feedback and Improvements:

The usability testing, performed by the professor and a student, yielded several constructive comments that allowed us to improve our website’s user experience:

  1. Front page clarity: Originally, the front page seemed promotional rather than informative. It was also perceived as being too wordy, creating confusion between it being a product page or a blog. We worked on this feedback by streamlining the content and making it more straightforward.

  2. GitHub link: The inclusion of the GitHub link led some users to believe we were promoting an open-source project. We felt that the github link was a useful addition to the website to allow users to find relevant code relating to the curio robot.

  3. Project ownership: It was unclear who was behind the project. We addressed this by adding an about us section on our website.

  4. Target audience: Users were unsure who the robot was designed for.

  5. Changes to the robot: Users were able to identify the changes made to the robot, indicating that our visual presentations were effective.

  6. Design journal clarity: The design journal was missing the process and thinking behind our design decisions. We added the dailies to our website under the blog section to address the issue on the lack of thinking behind our design.

  7. Explanation of sketches: Users wanted to see explanations for our design sketches. The explanations were done on the prototype page.

  8. Navigation: The design of the page didn’t clearly guide users to where they could find the design sketches and ideas. We added a navigation tab at the left side of the design journal page to allow the user to traverse the different pages.)

Learning Points

We tried our best to address all these points of feedback in the latest iteration of our website. We also better understood the importance of usability testing having experienced it. It allowed us to better understand what the user goes through when browsing our website and their thoughts and actions when interacting with the website. This helps us understand the pain points of our website and make adjustments to enhance the user experience when browsing the website. We will continue to monitor user feedback and make further enhancements as necessary. Usability testing proved to be an invaluable tool in our design process, helping us create a website that is not only user-friendly but also effectively communicates our project’s essence and progress.

· 2 min read

Today’s Progress:

Usability Testing Lesson:

Today, we had a lesson on usability testing. The session emphasized the importance of ensuring our designs and prototypes are both effective and user-friendly. The key takeaways are:

  • Usability testing allows us to identify potential issues and areas of confusion in a design before it becomes a finalized product.
  • The process involves asking the intended users of a product to perform certain tasks under observation. This enables us to see where they might encounter problems or feel confused.
  • Collecting data from a diverse user base is crucial as different individuals might interact with the product differently.
  • The feedback collected from usability testing is a vital resource that can guide us in refining and enhancing our design.

Instruction Creation Activity:

We also conducted an activity that involved creating instructions to guide a user in building a specific object. In our case, we decided to write steps to create a paper plane. We unexpectedly found that it was difficult to write steps to create the paper plane as it had to be specific enough for the user to recreate the plane and simple enough that the steps were not too complex and prevent the user from following or understanding the steps. This exercise highlighted the need for clear and concise instructions that users of varying ages and abilities can follow easily.

Learning points

  • Understanding your audience: Knowing whether we are testing on a teenager or an older individual, for instance, is crucial, as it might influence how the instructions are designed and delivered.
  • Time taken to learn: Monitoring the time it takes for a user to learn how to use or build the prototype can provide valuable insights into the intuitiveness and ease-of-use of our designs.
  • we also learnt the importance of giving the right tasks for the testing such as making it actionable, realistic, specific, in order to obtain the most information from the user, such as their thought process when navigating our website.

· 3 min read

Today’s Progress:

Designer Engagement Session: Today, we had an enriching conversation with the designer of the Curio robot. We discussed various design aspects and gathered valuable insights to steer our prototyping process. Here’s a summary of the key points shared:

  • Stepper Motors: The designer emphasized the use of stepper motors as the most cost-efficient option for achieving precision, a key requirement for the Curio robot.
  • Constraints: Challenges include enabling the robot to tilt at various angles.
  • Experimental Process: The designer acknowledged that a lot of the ongoing work is still experimental.
  • Easy Assembly and Detachability: He pointed out that it takes a while to assemble the entire robot, and an easy-to-assemble and detachable design would be beneficial.
  • Keeping Material Costs Low: Efforts are made to use cost-effective materials. For example, servo motors with electronic magnets were deemed impractical as they would cost two-thirds of the entire cost. The wheels and back wheel are always kept in stock, and materials used are kept simple, with possibilities of using 3D printing and plastic for wheels.
  • Phone Stand: The current phone stand design was identified as a weak point due to its floppiness.
  • Modularity: Modularity is preferred as most universities can 3D print the components.
  • Hardware Constraints: Curio has a control board which is impossible to have users make from scratch. Thus, the main constraints for the robot are in hardware, specifically the motor.

Feedback on our Prototype:

  • The designer suggested using a stepper motor instead of a DC motor (like in the Smartibot) to aid with precision.
  • He praised the versatility of our design, which allows students to assemble the robot as per their preference instead of shipping a fully assembled bot, which might get damaged in transit.
  • He was impressed with the clamp design, suggesting we should consider our specific use case and work towards it.

Teaching Assistant (claretb) Feedback

Team10B: We agreed that we need to further refine our design to increase its value in facilitating learning. This includes justifying design choices, such as the addition of a adjustable phone stand at the back of the Smartibot.

Claretb: It’s good idea exactly but can you explain more about how justifying design choices can make the learning better?

Team10B: Thanks for the question, when we mentioned ‘justifying design choices,’ we meant more about explaining the rationale behind why we’ve chosen to design our robot in a particular way. For example, from the student’s point of view, when they are building and using their Curio robots they are able to understand these design choices gives them insight into how the robot works and why.

Sketches

We came out with another prototype sketch.

Sketch

Prototype

We use cardboard to make the sketch prototype.

Front:

Attachment

Side:

Side

· 2 min read

Today’s Progress:

Consultation with the Professor: We consulted with the professor regarding our current prototype design yesterday. The discussion brought to light several key points to ponder about:

  1. We could replace the front design of the smartibot with a simpler design that was easier to assemble.

  2. Battery Pack Integration: Incorporating the Curio robot’s battery pack, which can be recharged using a Type-C cable, was considered a valuable step. This will reduce the need for frequent battery replacements when the robot ran out of battery.

  3. We agreed that we need to further refine our design to increase its value in facilitating learning. This includes justifying design choices, such as the addition of a adjustable phone stand at the back of the Smartibot.

Feedback Response: We received some insightful comments suggesting the creation of an attachable design with various modules. The suggestion to consider using the existing Curio design and create additional attachments was especially interesting. We thought of some ideas in that we could add more holes into the base of the curio robot which allowed for modifications or additional modules to be added to the robot via the holes. This could help encourage students to be more creative with their robot designs.

Teaching Assistant (claretb) Feedback

We agreed that we need to further refine our design to increase its value in facilitating learning. This includes justifying design choices, such as the addition of a adjustable phone stand at the back of the Smartibot.

It’s good idea exactly but can you explain more about how justifying design choices can make the learning better?

· 2 min read

Today’s Progress:

Integrative Thinking Template: During our class today, we learnt about the concept of integrative thinking. This problem-solving approach allowed us to explore ways to leverage opposing models to generate innovative solutions. We’ve learned and practiced the step-by-step process, as outlined below:

  1. Identify Two Opposing Models: This involves identifying two contrasting models or solutions based on a problem statement.

  2. Build a Pro-Pro Chart: In this step, we learned to identify the advantages of each model, encouraging us to value and leverage the strengths of each.

  3. Identify the Tension: We discovered how to highlight the core tension between the models

  4. Create a new Choice: With a clear understanding of the tension and the pros of each model, we then innovated a new model that integrates the strengths of both while addressing the tension.

Sketch Updates

Alongside our classroom learnings, we continued to build on our design sketches.

Core

Attachment

servo

Shield

Teaching Assistant (claretb) Feedback

Attachments:

Attachment

It really makes sense to create an attachable design with some attachments. In this way the robot can be converted to a race car or a sumo bot or anything you want. One of the most attracting things for me is making some modular thing.

Even you don’t have to create a robot from scratch. Maybe you can use the current Curio design and create some attachments. Just an idea…

· 2 min read

Today’s Progress:

  • Sketches: Our team worked on creating new design sketches using AutoCAD. The focus of these sketches was to envision a design that is simple to assemble and uses recyclable materials such as cardboard.

  • Weekly Pitch Video Feedback: We received valuable feedback on our presentation video from both our professor and teaching assistant. Their comments have given us a fresh perspective and actionable insights to improve our design process and future presentations.

Our thoughts on the feedback

Overall we felt that our project was on the right track as the our goals and the scope of the project align with what the professor had in mind. We were also able to gain insight into what aspect of the project we should focus on such as the designs and analyses on Curio as well as the specific parts of the Curio robot that can be improved on in terms of sustainability. The professor also pointed out the fact of the likelihood of the robot being damaged which was something that we considered as group and felt that one possible solution was including a “base plate” sort of design where the user could replace the damaged part by cutting out an outline on a piece of cardboard on the base plate. We also noted that we should include what we learnt from the prototypes and pick out certain features or points that can be incorporated into our final design such as the front and back of the smartibot. We gained valuable feedback on the video as a whole and will tweak the future pitch videos to sound less sped up, include our learning and the designs and analyses on Curio.

AutoCAD Sketches

Front view:

Front view

Back view:

Back view

Side view:

Side view

Sketch

We have sketched the top view too.

Top view:

Top view

Videos

The car moving forward.

IMAGE ALT TEXT HERE

The car doing a 360°turn

IMAGE ALT TEXT HERE

· 2 min read

Today’s Progress:

Clarifying Deliverables: Today, we had a productive discussion with our professor to gain clarity on the project deliverables. The conversation allowed us to understand the project’s expectations better and what is actually required of the team.

Simplified Assembly: The professor stressed the importance of ensuring our final product is easy to assemble, similar to an ‘out-of-the-box’ concept. He also highlighted the comparisons between the curio and smartibot design features and how each design had its own advantages and disadvantages and finding a middle ground between the two designs would be ideal.

Iterative Design: We also established that while our final product can be one finalized design, it is crucial to document and demonstrate the design iterations that lead to the final product. This will showcase our design journey and the considerations that shaped the final product.

Prototyping Session:

Our class today was dedicated to understanding more about prototyping methodologies. We gained insights into choosing a prototyping method suitable for our project as well as clearing up any prior misconceptions we had about prototyping. It also helped us learn more about the logic and steps to prototyping that we may not have considered going into the class.

Reflections and Learnings:

Overall, the professor’s advice has given us a clearer direction on how to approach the design process. We understood the importance of simplicity and ease of assembly in our design, which will guide our prototyping phase. Learning about various prototyping methodologies has also given us a toolbox of techniques we can choose from, depending on the specific needs of each design iteration.

Smartibot

We sketched this out to find out more about how we can incorporate certain design features of the smartibot into our prototype.

Front view of the smartibot:

Front view

Back view of the smartibot:

Back view

Images of Sketches:

We have sketched some preliminary ideas.

Initial Idea 1:

idea 1

Initial Idea 2:

idea 2